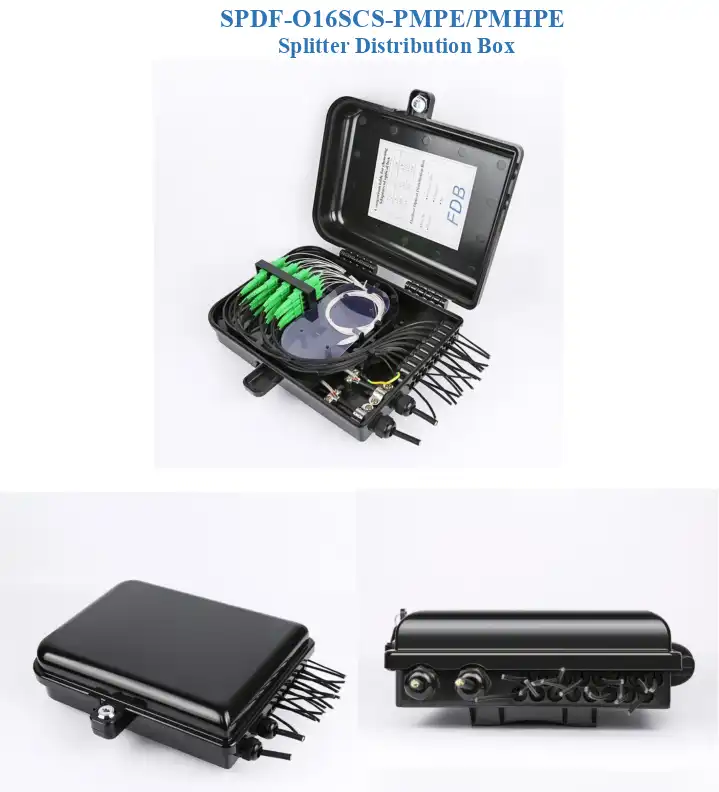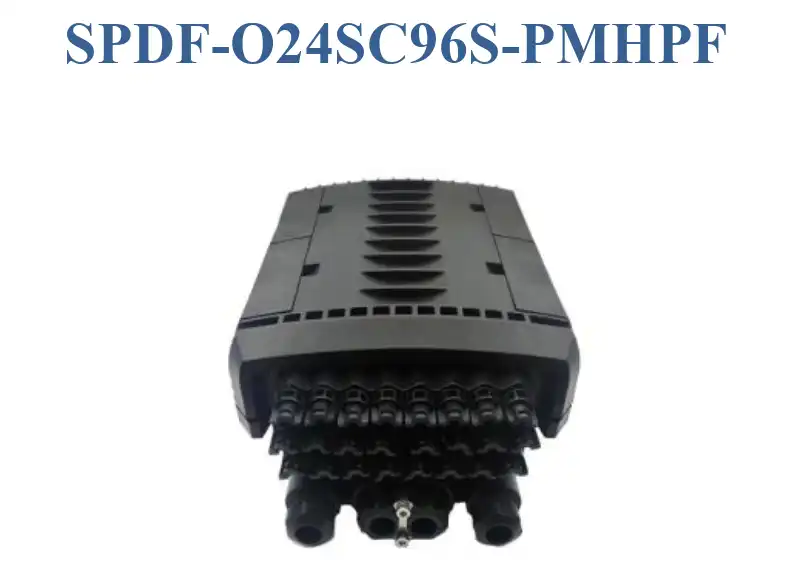
SPDF-O24SC96S-PMHPF Outdoor Pole Mounted Fiber Closure: Complete Installation and Usage Guide
This article is based on actual SPDF-O24SC96S-PMHPF product specifications and installation instructions, including complete product specifications, accessories list, and installation steps
The SPDF-O24SC96S-PMHPF is designed to seal without screws. The compact size and flip-over cover bring easy operation as well as complete function. The splice trays are jointed with a hinge at one side, which makes the operation in each tray easier. It is designed to prevent from operation damage, suitable for fiber splicing and distribution networks.
I. Product Specifications
| Parameter | Specification |
|---|---|
| Dimension(mm) | 385x245x155 |
| Weight(kg) | 4.5~5 |
| Max. capacity(Single fiber) | 96 fibers |
| Sealing type | Mechanical |
| Single splice tray capacity(Single fiber) | 24 fibers |
| Splice tray quantity | 1~4 trays |
| Cable ports | 1 input cable port for un-cut cable (diameter 10-17.5mm); 2 output cable ports for cable diameter 8-17.5mm; 16 output cable ports for cable diameter less than 4mm |
II. Main Technical Data
- Environmental temperature: -40C~+65C
- Optical performance: No significant additional attenuation
- Protection grade: IP68
III. Closure and Accessories List
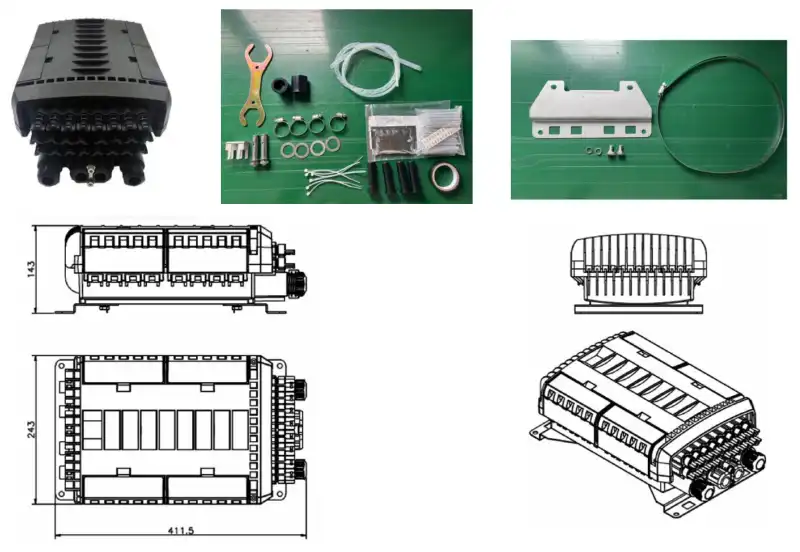
Main Kits
| S/N | Description | Quantity | Note |
|---|---|---|---|
| 1 | Lid | 1 | 385(L)x242(W)x155(H)mm |
| 2 | Base | 1 | |
| 3 | Sealing ring | 1 | Box sealing |
| 4 | Sealing parts | 16 | Sealing cable ports |
| 5 | Splice tray | 4 | For cable splicing and storage |
| 6 | Splice tray cover | 1 | |
| 7 | Splice tray bandage | 1 | Fixing several splice trays |
| 8 | Fastener bolt | 2 | Fixing lid and cover of closure |
| 9 | Buckle | 4 | Fixing lid and cover of closure |
| 10 | Tight nuts | 16 | Sealing soft cable ports |
| 11 | Tight tool | 1 | Special for tight the nuts |
| 12 | Cable fixing panel | 1 | Fixing un-cut cable |
Adaptor
| S/N | Description | Quantity | Note |
|---|---|---|---|
| 13 | Adaptor installation panel | 4 | An adaptor panel for 6 SC simplex adaptors |
| 14 | Splice tray bracket | 1 | Install 4 splice trays |
| 15 | Top cover stopper | 1 | Limit top cover |
| 16 | Plastic nuts | 2 | Fixing cable |
Standard Parts
| S/N | Description | Quantity | Note |
|---|---|---|---|
| 17 | Wall mounting kit | 1 | For wall mounting |
| 18 | Expansion anchor bolt | 2 | Parts of the wall mounting kit |
| 19 | Hexagon bolt | 2 | Parts of the wall mounting kit |
| 20 | Nylon tie (3x120mm) | 12 | Fixing cable |
| 21 | Fusion sleeve (Diameter 1.0x60mm) | According to the fiber cores | Cable splicing |
| 22 | 0.2m coil tube | 1 | Protect the fiber |
| 23 | Insulation tape | 1 | Accessory fixation |
| 24 | 0.5m EVA tube | 1 | Protect fiber |
| 25 | Drier | 1 | |
| 26 | M6 internal hexagonal wrench | 1 | Tool to open the box |
| 27 | 14# grommet | 2 | For cable dia From 12-17.5mm |
| 28 | 41# grommet | 2 | For cable dia From 8-12mm |
| 29 | Plastic plug | 4 | Seal the cable port |
| 30 | Iron spanner | 1 | Tool |
Optional Parts
| S/N | Description | Quantity | Note |
|---|---|---|---|
| 25 | Pole mounting kit | 1 | For pole mounting |
| 26 | Valve | 1 | Testing sealing performance |
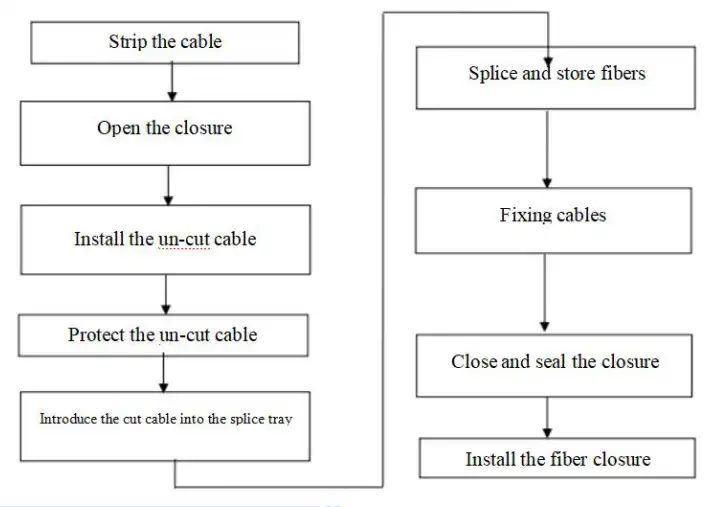
IV. Working Procedure
Check Up
- Check the item number and accessories of fiber closure
- Check the fiber specification
- Check the parts quantity
- Check the instrument
- Tools as below:
- Transverse cutting knife for cable outer security layer
- Longitudinal open cable knife
- Steel core cut clamp
- Cross screwdriver
- M6 hexagonal socket wrench
- Scissors
- Cutting clamp
The Procedure to Strip the Cable Fiber
- Mark the cut point on the cable according to the different length requirements
- Strip the cable outer layer
- The requirement for stripping the un-cut cable:
- The length should be no less than 2000mm
- Cut the steel core at the length of 50mm of the cable cut point
- The requirement for stripping the cut cable:
- The length should be no less than 1000mm
- Cut the steel core at the length of 50mm of the cable cut point
Note: ① Be sure not to damage fiber. ② Do not use any damaged cable.
Open the Closure
- Use the tool to pry buckles
- Open the lid, take out the accessories
- In order to prevent the closure lid falling down when installation, take out the block from the splice tray installation bracket and put the block as below picture
Un-cut Cable and Branch Cable Working Procedure
- Remove the plastic nuts and take out the cable sealing components
- Cut the grommet to pass through the un-cut cable
- Split the other two components, according to the sequence to install the un-cut cable mounting components
- After the cable passing through the ports into the box, tighten the hose clamps, fixing cable
- Fix back the briquetting of the input port
- Use EVA tube to protect the bare fibers and winding the stripped cable by insulation tape
- Cable get through in turn the plastic nut, washer, grommet, washer, then install to the closure port
- After the cable get through the closure, tight the hose clamp and fix the steel core of cable
- Then tight the plastic nut
- If no cable get through the cable ports, use plastic plug to seal the grommet
Clear Up the Cable Routing
- Protect the bare fiber by coil tube and clear up the cable
Introduce the Cut Cable into the Splice Tray
- Protect the bare fiber by coil tube and clear up the cable, then introduce into the splice tray
Fiber Splicing Process
- Introduce the fiber into the splice tray
- Splicing the fibers
- Put in the fusion sleeve into the splicing holder accordingly
- Use the tool to coil, storage the balance fibers
- Cover the splice tray cover and put back the tool on the tray cover
Soft Cable Port Working Procedure
- For pre-terminated cable (with connectors), first insert the white parts of soft cable into the gap of the tight nut, then move the plastic nuts to the black parts of the soft cable, then assemble the sealing parts to the soft cable and put in the pigtail to the closure ports and connect to the SC adaptors. (Daub the grease on the sealing grommet if feels hard to insert the cable)
- For cable without pre-terminated connectors, insert the cable into the tight nut without gap and then the sealing part. Then terminate the cable with connectors and connect them to the adapters if needed.
Note: Please specify Tight Nut and Sealing Part types when order.
| Item | Tight Nut | Suitable Sealing Part |
|---|---|---|
| 1 | with gap for cable diameter less than 4mm | Cable diameter less than 4mm |
| 2 | with gap for cable diameter less than 2mm and FTTH Drop Cable 2.0x3.0mm | Cable diameter less than 4mm |
| 3 | without gap for cable diameter less than 7mm | Cable diameter less than 4mm or 7mm for option |
- Tighten back into the closure ports
- After tighten the bottom of the cable bolts, use the nylon tie to tie the cable for fixing cable
Close the Fiber Closure
- Close the closure and close the four buckles, also tighten the bolts
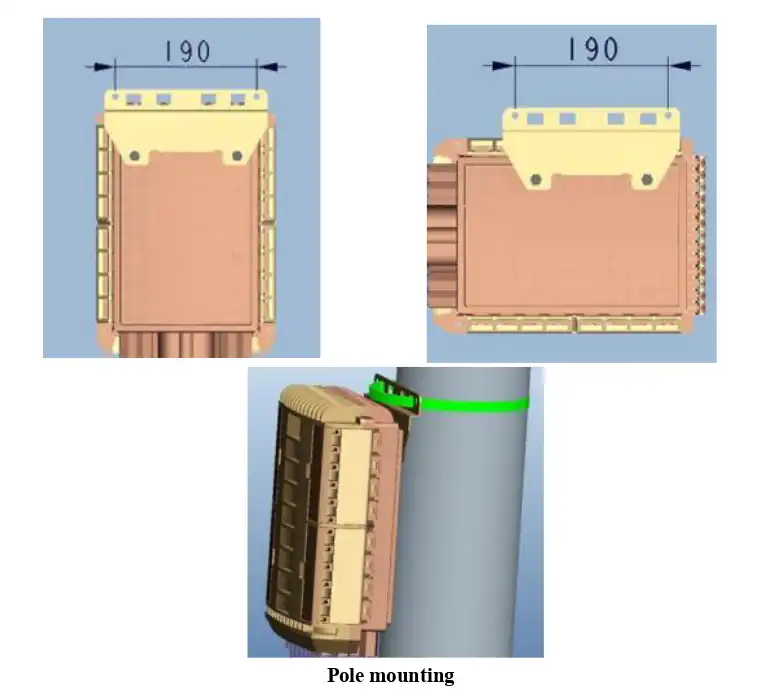
V. Pole Mounting
The SPDF-O24SC96S-PMHPF supports pole mounting method, suitable for outdoor aerial cable networks. Using the pole mounting kit (optional accessory), the closure can be securely mounted on utility poles.
VI. Ordering Information
| Model | Description |
|---|---|
| SPDF-O24SC96S-PMHPF | Splitter Distribution Box Outdoor pole mounted 24cores Simplex SC/Duplex LC type 96 cores Fusion maximum capacity available for Steel tube splitter installation without adaptors, pigtails and splitter Plastic type F |
Note: If you need more customized services, please contact us
Email: info@sopto.com.cn
Website: http://www.sopto.com.cn